
| 일 | 월 | 화 | 수 | 목 | 금 | 토 |
|---|---|---|---|---|---|---|
| 1 | 2 | 3 | ||||
| 4 | 5 | 6 | 7 | 8 | 9 | 10 |
| 11 | 12 | 13 | 14 | 15 | 16 | 17 |
| 18 | 19 | 20 | 21 | 22 | 23 | 24 |
| 25 | 26 | 27 | 28 | 29 | 30 | 31 |
- console창
- php
- 파이썬
- 에러
- MySQL
- Visual Studio Code
- 깃 토큰
- error
- OrCAD 다운로드
- vscode
- run sql script
- localhost
- 데이터베이스
- jupyter
- database
- github token
- 따옴표 삭제
- 오류
- DataGrip
- clone
- Python
- csv
- import data
- github clone
- cmd
- 단축키
- PHPStorm
- visualstudio code
- error 해결
- 클론
- Today
- Total
개발 노트
9/1 JSP의 Get, Post 방식, IP, DNS, Port 본문
9/1 JSP의 Get, Post 방식, IP, DNS, Port
hayoung.dev 2022. 9. 9. 19:00[05]
<!DOCTYPE html>
<html>
<head>
<meta charset="UTF-8">
<title>Insert title here</title>
<script type="text/javascript">
function chk() {
if (frm.name.value=="") {
alert("이름 입력?");
frm.name.focus();
return;
}
if (!frm.age.value) {
alert("나이 입력");
frm.age.focus();
return;
}
if (isNaN(frm.age.value)) {
alert("나이가 문자임");
frm.age.focus();
frm.age.value="";
return;
}
var addr = document.getElementById("addr");
if (addr.value.length == 0) {
alert("주소 좀 넣어줄래");
addr.focus();
return;
}
}
</script>
</head>
<body>
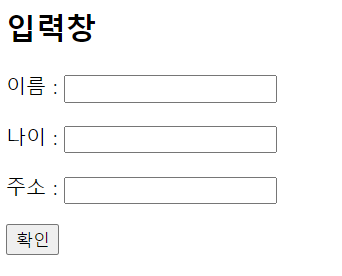
<h2>입력창</h2>
<form action="" name="frm">
이름 : <input type="text" name="name" id="name"> <p>
나이 : <input type="text" name="age" id="age"> <p>
주소 : <input type="text" name="addr" id="addr"> <p>
<input type="button" value="확인" onclick="chk()"> <p>
</form>
</body>
</html>출력 결과
checkBox01.html
<!DOCTYPE html>
<html>
<head>
<meta charset="UTF-8">
<title>Insert title here</title>
<script type="text/javascript">
function chk() {
var str="좋아하는 영화는?\n";
//만약 체크돼있으면 value값을 str에 누적시킨다.
//name이라서 frm.ch1 같은 형식으로 표현할 수 있는것임.
if(frm.ch1.checked) str += frm.ch1.value+"\n";
if(frm.ch2.checked) str += frm.ch2.value+"\n";
if(frm.ch3.checked) str += frm.ch3.value+"\n";
alert(str); //누적된걸 alert로 보여준다.
}
</script>
</head>
<body>
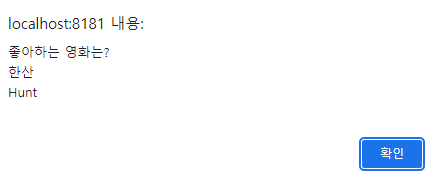
<h2>좋아하는 영화를 선택하세요</h2>
<form action="" name="frm">
<!-- 디자인 할 것이 아니라면 이렇게 코딩해도 된다. 권장은 아님. -->
리미트 <input type="checkbox" name="ch1" id="m1" value="리미트">
<label for="m2">한산</label>
<input type="checkbox" name="ch2" id="m2" value="한산">
<label for="m3">Hunt</label>
<input type="checkbox" name="ch3" id="m3" value="Hunt">
<input type="button" value="확인" onclick="chk()">
</form>
</body>
</html>출력 결과 (내가 선택한 것을 보여준다.)

checkBox02.html
<!DOCTYPE html>
<html>
<head>
<meta charset="UTF-8">
<title>Insert title here</title>
<script type="text/javascript">
	function chk() {
		var str = "좋아하는 영화는?\n";
		for (var i = 0; i < frm.movie.length; i++) {
			if (frm.movie[i].checked) //name을 같게 하여 배열처럼 표현할 수 있다.
				str += frm.movie[i].value + "\n";
		}
		alert(str);
	}
</script>
</head>
<body>
	<h2>좋아하는 영화를 선택하세요2</h2>
	<form action="" name="frm">
		<label for="m1">리미트</label>
		<input type="checkbox" name="movie" id="m1" value="리미트">
		<label for="m2">한산</label>
		<input type="checkbox" name="movie" id="m2" value="한산">
		<label for="m3">Hunt</label>
		<input type="checkbox" name="movie" id="m3" value="Hunt">
		<input type="button" value="확인" onclick="chk()">
	</form>
</body>
</html>
출력 결과 (내가 선택한 것을 보여준다.)


file.html
<!DOCTYPE html>
<html>
<head>
<meta charset="UTF-8">
<title>Insert title here</title>
</head>
<body>
<!-- 이미지 선택해서 업로드 -->
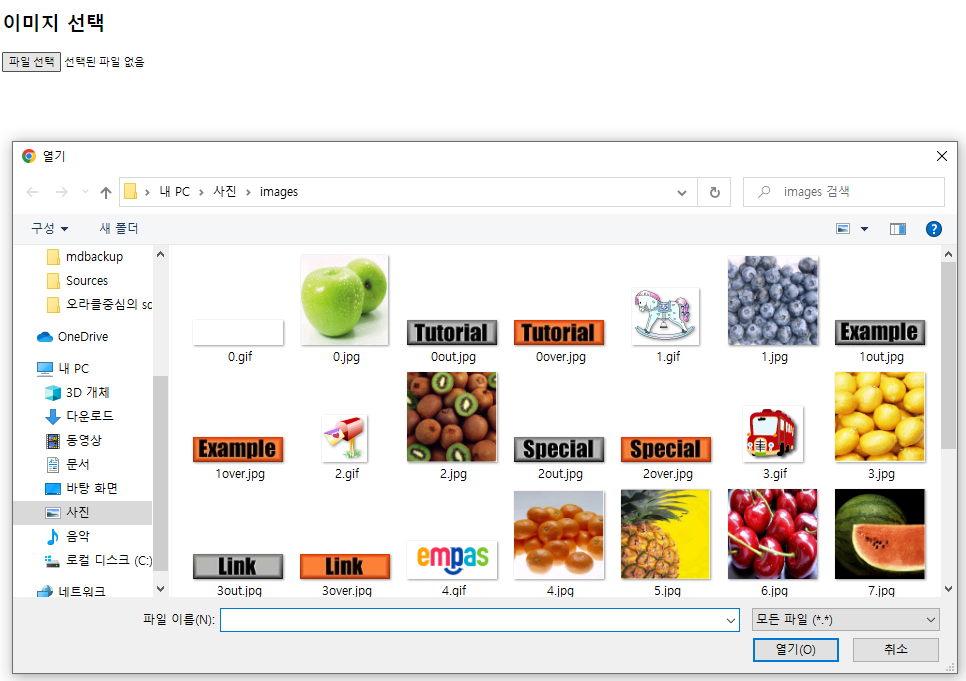
<h2>이미지 선택</h2>
<form action="" method="post" enctype="multipart/form-data">
<input type="file" name="file">
</form>
</body>
</html>출력 결과 : 파일 선택을 누르면 파일을 선택할 수 있게 해준다.
selColor01.html
<!DOCTYPE html>
<html>
<head>
<meta charset="UTF-8">
<title>Insert title here</title>
<script type="text/javascript">
function chk() {
var str = "내가 좋아하는 색깔은\n";
/* frm의 color에 있는 option 중 선택된 인덱스의 값을 backgroundColor에 넣는다. */
document.body.style.backgroundColor = frm.color[frm.color.selectedIndex].value;
document.body.style.color = "white" //글자색
}
</script>
</head>
<body>
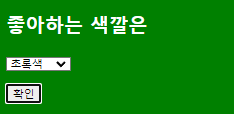
<h2>좋아하는 색깔은</h2>
<form action="" name="frm">
<select name="color"> <!-- 여기에 onchange="chk()"를 넣으면 확인버튼을 누르지 않아도 색이 변한다. -->
<!-- 선택박스는 사용자가 입력값을 다르게 입력할 일이 없어 좋음 -->
<option value="red">빨강색</option>
<option value="orange">오렌지색</option>
<option value="yellow">노랑색</option>
<option value="green" selected="selected">초록색</option>
<option value="blue">파랑색</option>
<option value="navy">남색</option>
<option value="violet">보라</option>
</select><p>
<input type="button" value="확인" onclick="chk()">
</form>
</body>
</html>출력 결과 (확인 누르기 전)

(초록색 선택 후 확인)
selColor02.html
<!DOCTYPE html>
<html>
<head>
<meta charset="UTF-8">
<title>Insert title here</title>
<script type="text/javascript">
function chk() {
var str = "내가 좋아하는 색깔은\n";
var vIndex = frm.color.selectedIndex; //선택된 인덱스를 vIndex에 넣음
var vIndexBg = frm.color.selectedIndex+1;
alert(vIndex); //인덱스 번호 확인 용 코드
if (vIndexBg > 6) {
vIndexBg = 0;
};
document.body.style.backgroundColor = frm.color[vIndex].value; //배경색
document.body.style.color = frm.color[vIndexBg].value; //글자색
}
</script>
</head>
<body>
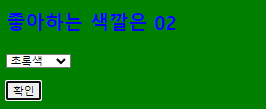
<h2>좋아하는 색깔은 02</h2>
<form action="" name="frm">
<select name="color" onchange="chk()">
<option value="red">빨강색</option>
<option value="orange">오렌지색</option>
<option value="yellow">노랑색</option>
<option value="green" selected="selected">초록색</option>
<option value="blue">파랑색</option>
<option value="navy">남색</option>
<option value="violet">보라</option>
</select> <p>
<input type="button" value="확인" onclick="chk()">
</form>
</body>
</html>
출력 결과 (확인 누르기 전)

(초록색 선택 후 확인)
radio.html
<!DOCTYPE html>
<html>
<head>
<meta charset="UTF-8">
<title>Insert title here</title>
<script type="text/javascript">
function chk() {
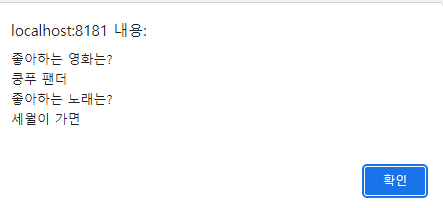
var mStr = "좋아하는 영화는?\n";
var sStr = "좋아하는 노래는?\n";
for(var i=0; i<frm.movie.length; i++) {
if (frm.movie[i].checked) {
mStr+= frm.movie[i].value+"\n";
break;
}
}
for (var j=0; j<frm.song.length; j++) {
if (frm.song[j].checked) {
sStr += frm.song[j].value + "\n";
break;
}
}
alert(mStr + sStr);
}
</script>
</head>
<body>
<form action="" name="frm">
<!-- 아이디는 각각 다른 이름으로 준다. radio는 같은 이름으로 통합한다. -->
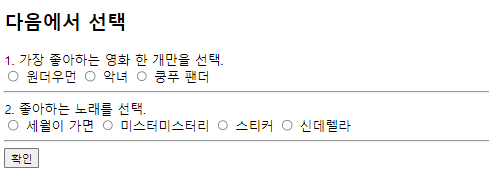
<h2>다음에서 선택</h2>
1. 가장 좋아하는 영화 한 개만을 선택.<br>
<input type="radio" name="movie" value="원더우먼" id="m1">
원더우먼
<input type="radio" name="movie" value="악녀" id="m2" >
<label for ="m2">악녀</label>
<input type="radio" name="movie" value="쿵푸 팬더" id="m3">
<label for ="m3">쿵푸 팬더</label>
<hr>
2. 좋아하는 노래를 선택. <br>
<input type="radio" name="song" value="세월이 가면" id="s1">
세월이 가면
<input type="radio" name="song" value="미스터미스터리" id="s2">
<label for="s2">미스터미스터리</label>
<input type="radio" name="song" value="스티커" id="s3">
<label for="s3">스티커</label>
<input type="radio" name="song" value="신데렐라" id="s4">
<label for="s4">신데렐라</label>
<hr>
<input type="button" value="확인" onclick="chk()">
</form>
</body>
</html>출력 결과 (선택 전)
(선택 후)

submit.html
<!DOCTYPE html>
<html>
<head>
<meta charset="UTF-8">
<title>Insert title here</title>
<script type="text/javascript">
	function chk() {
		if (!frm.id.value) {
			alert("이름 ?");
			frm.id.focus();
			return false;
		}
		if (!frm.pass.value) {
			alert("암호 ?");
			frm.pass.focus();
			return false;
		}
		/* true가 돼야 action을 수행함. */
		return true;
	}
</script>
</head>
<body>
	<h2>로그인 Get / Post *****</h2>
	<!-- onsubmit을 하면 return chk()를 먼저 체크하고 true가 되어야 action을 실행한다 -->
	<form action="http://www.daum.net" name="frm" onsubmit="return chk()">
		<table border="1" bgcolor="yellow">
			<tr>
				<td>아이디</td>
				<td><input type="text" name="id"></td>
			</tr>
			<tr>
				<td>암호</td>
				<td><input type="password" name="pass"></td>
			</tr>
			<tr>
				<td><input type="submit" value="확인"></td>
				<td><input type="reset" value="취소"></td>
			</tr>
		</table>
	</form>
</body>
</html>
출력 결과
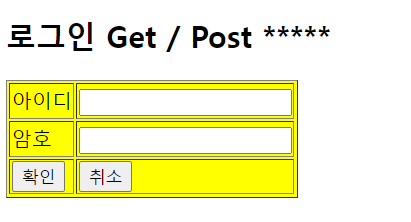
(id에 abc를 넣고 pass에 1234를 넣었을 때)
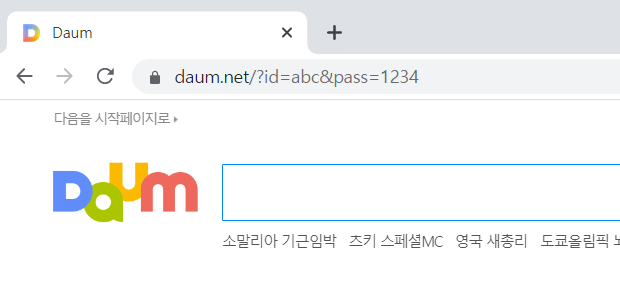
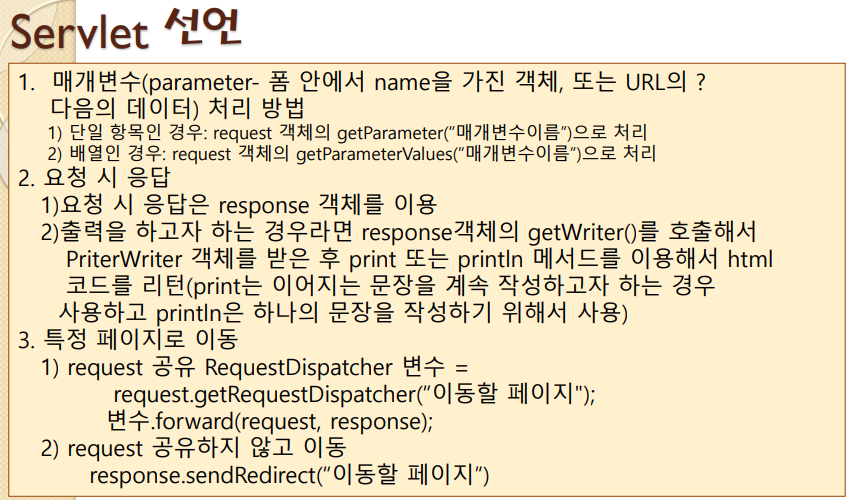
url에서
?는 파라미터
id, pass는 변수명
&는 and
[JSP]
URI는 URL의 의미를 포함. URL(Uniform Resource Locator) : 자원이 실제로 존재하는 위치를 가리키며, URI(Uniform Resource Identifier) : 자원의 위치뿐만 아니라 자원에 대한 고유 식별자
HTTP 프로토콜 개요
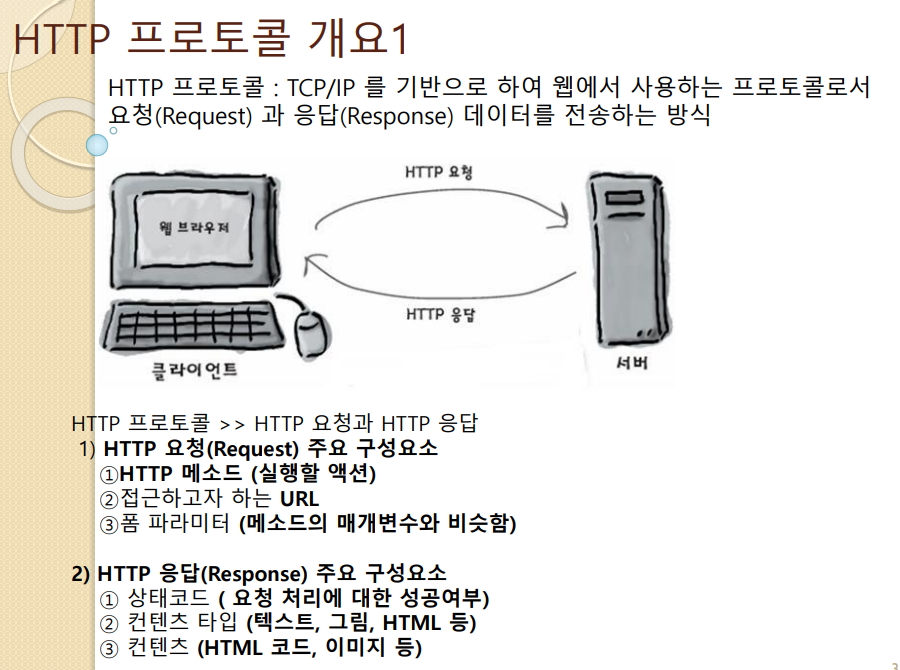
Servlet / JSP

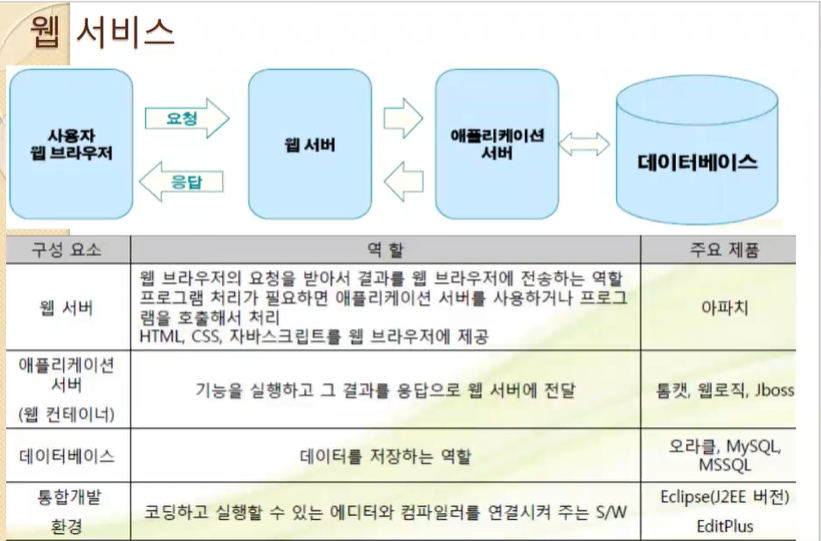
웹 서비스
JSP 개요
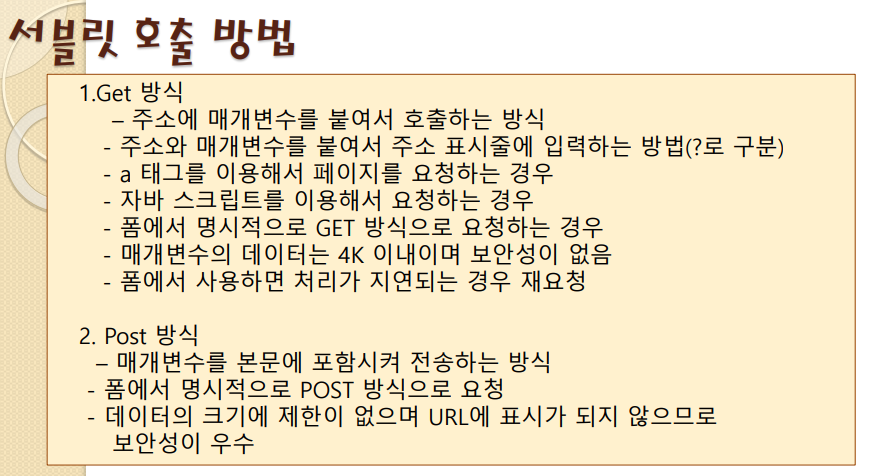
Get, Post 방식 중요함 (중요 : 별표 5개, 면접에 나옴)
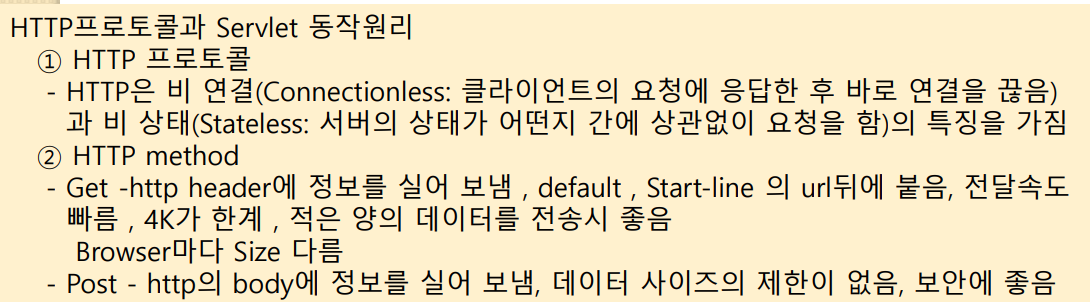
default는 get 방식
Post는 body에 작성하기 때문에 사이즈 제한이 없다. url에 뜨지 않기 때문에 보안에 좋다.
submit.html
<!DOCTYPE html>
<html>
<head>
<meta charset="UTF-8">
<title>Insert title here</title>
<script type="text/javascript">
	function chk() {
		if (!frm.id.value) {
			alert("이름 ?");
			frm.id.focus();
			return false;
		}
		if (!frm.pass.value) {
			alert("암호 ?");
			frm.pass.focus();
			return false;
		}
		/* true가 돼야 action을 수행함. */
		return true;
	}
</script>
</head>
<body>
	<h2>로그인 Get / Post *****</h2>
	<!-- onsubmit을 하면 return chk()를 먼저 체크하고 true가 되어야 action을 실행한다 -->
	<!-- <form action="http://www.daum.net" name="frm" onsubmit="return chk()"> -->
	<form action="http://www.naver.com" method="post" name="frm" onsubmit="return chk()">
		<table border="1" bgcolor="yellow">
			<tr>
				<td>아이디</td>
				<td><input type="text" name="id"></td>
			</tr>
			<tr>
				<td>암호</td>
				<td><input type="password" name="pass"></td>
			</tr>
			<tr>
				<td><input type="submit" value="확인"></td>
				<td><input type="reset" value="취소"></td>
			</tr>
		</table>
	</form>
</body>
</html>
출력 결과
action으로 사이트에 접속했을 때 url에는 입력한 아이디와 암호가 보이지 않는다.

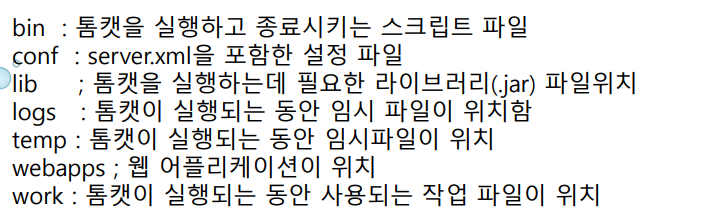
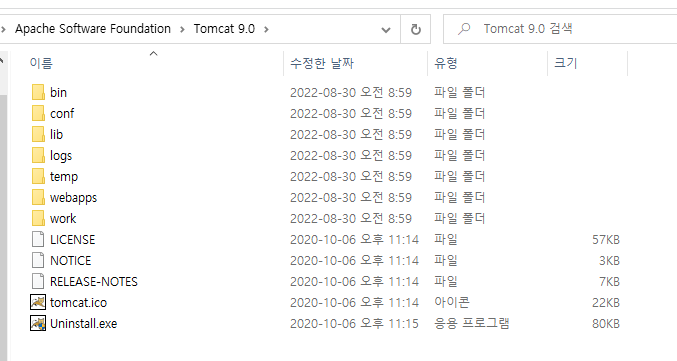
[Tomcat 디렉토리]
(중요 : 알아두기)
- IP : 네트워크상에서 컴퓨터를 식별할 수 있는 주소
- DNS : IP주소를 인간이 쉽게 외우도록 맵핑한 문자열
- Port : IP주소가 컴퓨터를 식별할 수 있게 해준다면, Port번호는 해당컴퓨터의 구동되고 있는 프로그램을 구분할 수 있는 번호
New Dynamic Web Project [och01] 생성(하단 무조건 체크하기)
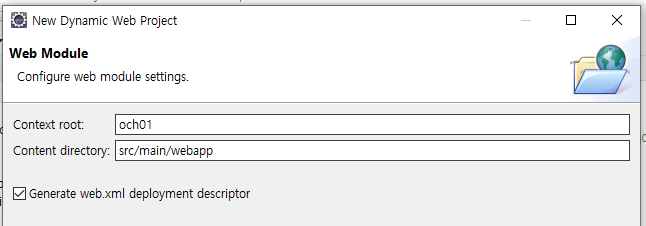
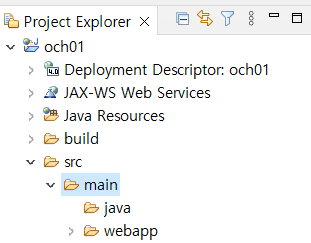
java에는 백엔드, webapp에는 프론트엔드 코드를 작성함.
och01>src>main>webapp>add3.html 생성
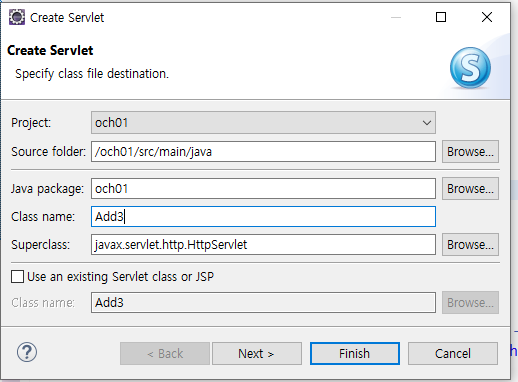
och01>src/main/java > new > servlet>
프로젝트명 och1와 똑같이 생성
수행되는 add3.html에서 action명인 Add3 이름을 그대로 사용
서블릿 이름은 첫 글자 대문자로 만들기.
저장되는 파일포맷은 .java임.
URL mappings은 Add3이 같이 실행된다는 뜻.
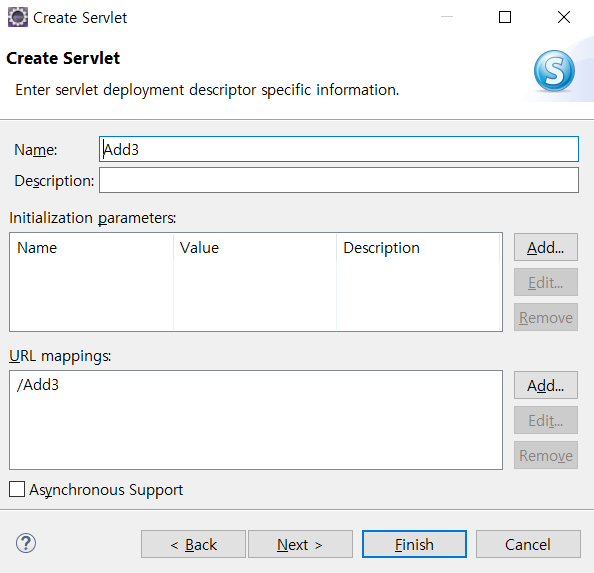
method="get" (method를 안쓰면 기본이 get 방식) 을 하면 서블릿에서 doGet을 작성.
method="post"면 서블릿에서 doPost를 작성.
[Servlet 선언]
[서블릿 클래스 작성]

[서블릿 호출 방법 Get 방식, Post 방식 (중요 : 별 5개, 면접에 무조건 나옴)]
add3.html
<!DOCTYPE html>
<html>
<head>
<meta charset="UTF-8">
<title>Insert title here</title>
<script type="text/javascript">
	function chk() {

		if (!frm.num.value) {
			alert("숫자를 입력하세요");
			frm.num.focus();
			return false;
		}
		if (isNaN(frm.num.value)) {
			alert("숫자가 아닙니다.");
			frm.num.focus();
			frm.num.value = "";
			return false;
		}
		return true;
	}
</script>
</head>
<body>
	<h1>숫자를 입력하세요</h1>
	<!-- <form action="Add3" name="frm" onsubmit="return chk()"> -->
	<form action="Add3" name="frm" method="post" onsubmit="return chk()">
		숫자 : <input type="text" name="num">
		<p>
			위치 : <input type="text" name="loc">
		<p>
			<input type="submit" value="확인">
	</form>

</body>
</html>
Add3.java
package och01;
import java.io.IOException;
import java.io.PrintWriter;
import javax.servlet.ServletException;
import javax.servlet.annotation.WebServlet;
import javax.servlet.http.HttpServlet;
import javax.servlet.http.HttpServletRequest;
import javax.servlet.http.HttpServletResponse;
/**
* Servlet implementation class Add3
*/
@WebServlet("/Add3")
public class Add3 extends HttpServlet {
private static final long serialVersionUID = 1L;
/**
* @see HttpServlet#HttpServlet()
*/
public Add3() {
super();
// TODO Auto-generated constructor stub
}
/**
* @see HttpServlet#doGet(HttpServletRequest request, HttpServletResponse response)
*/
protected void doGet(HttpServletRequest request, HttpServletResponse response) throws ServletException, IOException {
//목표 : 1부터 누적값 전달
//html의 num 파라미터에서 받은 값.
//숫자가 입력돼도 문자로 넘어오기 때문에 Integer로 변환 필요.
//request 객체 안에 html에서 받은 값들이 들어있음.
int num = Integer.parseInt(request.getParameter("num"));
String loc = request.getParameter("loc");
//System.out.print의 출력결과는 하단의 console로 확인가능.
System.out.println("Add3 num=>"+num);
int sum = 0;
for (int i=1; i<=num; i++) {
sum += i;
}
//파라미터를 request로 넘어갔을 때 한글을 쓰게 되면 이 설정을 해야 함.
request.setCharacterEncoding("utf-8");
//utf-8로 인코딩하겠다는 뜻.
response.setContentType("text/html;charset=utf-8");
//하단은 사용자 브라우저에 보여주는 객체 공식코드
//결과값을 보여줄 땐 response 객체에 받아서 보여준다.
//java 코드임에도 html 코드를 섞어 작성해야 한다는 것이 단점.
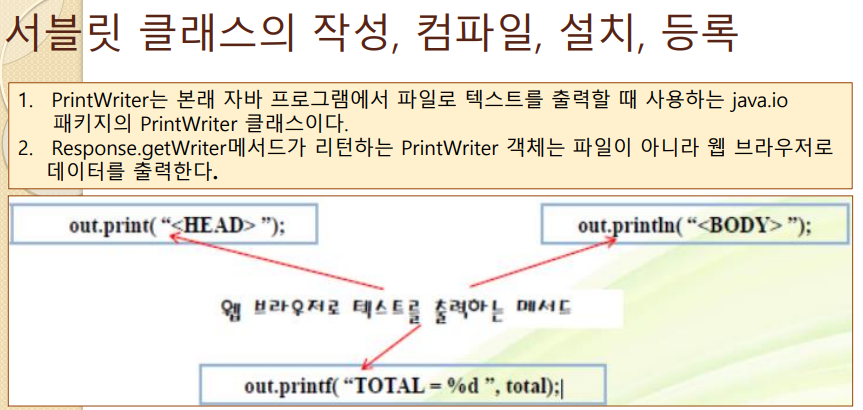
PrintWriter out = response.getWriter();
out.println("<html><body>");
//num값을 %d에 담아 보여준다.
out.printf("<h1>1부터 %d까지 합계</h1>", num);
out.printf("<h4>LOC--> %s</h4>", loc);
out.println(sum);
out.println("</body></html>");
out.close();
}
/**
* @see HttpServlet#doPost(HttpServletRequest request, HttpServletResponse response)
*/
protected void doPost(HttpServletRequest request, HttpServletResponse response) throws ServletException, IOException {
System.out.println("doPost 시작");
doGet(request, response);
}
}
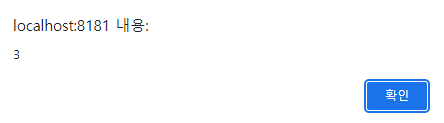
출력 결과
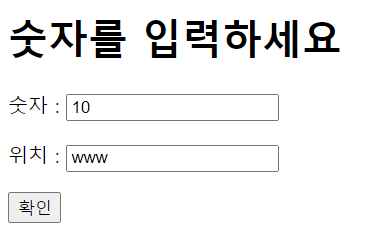
(확인 눌렀을 때)

gugu.html
<!DOCTYPE html>
<html>
<head>
<meta charset="UTF-8">
<title>Insert title here</title>
</head>
<body>
<h1>보고싶은 구구단은?</h1>
<form action="GuGu">
	<select name="num">
		<option value="2">2단</option>
		<option value="3">3단</option>
		<option value="4">4단</option>
		<option value="5">5단</option>
		<option value="6">6단</option>
		<option value="7">7단</option>
		<option value="8">8단</option>
		<option value="9">9단</option>
	</select>
	<input type="submit" value="선택완료">
</form>
</body>
</html>
GuGu.java
package och01;
import java.io.IOException;
import java.io.PrintWriter;
import javax.servlet.ServletException;
import javax.servlet.annotation.WebServlet;
import javax.servlet.http.HttpServlet;
import javax.servlet.http.HttpServletRequest;
import javax.servlet.http.HttpServletResponse;
import org.apache.catalina.connector.Response;
/**
* Servlet implementation class GuGu
*/
//@WebServlet이 연결하는 역할을 해 준다.
//@WebServlet("/GuGu")
public class GuGu extends HttpServlet {
private static final long serialVersionUID = 1L;
/**
* @see HttpServlet#HttpServlet()
*/
public GuGu() {
super();
// TODO Auto-generated constructor stub
}
/**
* @see HttpServlet#doGet(HttpServletRequest request, HttpServletResponse response)
*/
protected void doGet(HttpServletRequest request, HttpServletResponse response) throws ServletException, IOException {
int num = Integer.parseInt(request.getParameter("num"));
response.setContentType("text/html;charset=utf-8");
PrintWriter out = response.getWriter();
out.print("<html><body>");
//num값을 %d에 담아 보여준다.
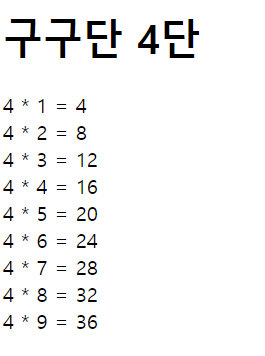
out.print("<h1>구구단 "+ num + "단</h1>");
for (int i =1; i<=9; i++) {
out.printf("%d * %d = %d<br>", num, i, (num*i));
}
out.println("</body></html>");
out.close();
}
/**
* @see HttpServlet#doPost(HttpServletRequest request, HttpServletResponse response)
*/
protected void doPost(HttpServletRequest request, HttpServletResponse response) throws ServletException, IOException {
// TODO Auto-generated method stub
doGet(request, response);
}
}
출력 결과

Web Setting에는 두 가지 방식이 있다.
1) Annotation setting : @WebServlet이 연결하는 역할을 해 준다. 이것이 기본 방식이다.
2) xml setting : @WebServlet을 주석처리하고 WEB-INF>web.xml에서 하단 <servlet> 코드를 추가한다.
예를 들어 GuGu.java 코드에서
@WebServlet("/GuGu")
를 주석처리 한 후
하단과 같이 web-inf 폴더 > web.xml 코드에 <servlet>코드를 추가한다.
<?xml version="1.0" encoding="UTF-8"?>
<web-app xmlns:xsi="http://www.w3.org/2001/XMLSchema-instance"
	xmlns="http://xmlns.jcp.org/xml/ns/javaee"
	xsi:schemaLocation="http://xmlns.jcp.org/xml/ns/javaee http://xmlns.jcp.org/xml/ns/javaee/web-app_4_0.xsd"
	id="WebApp_ID" version="4.0">
	<display-name>och01</display-name>
	<welcome-file-list>
		<welcome-file>index.html</welcome-file>
		<welcome-file>index.jsp</welcome-file>
		<welcome-file>index.htm</welcome-file>
		<welcome-file>default.html</welcome-file>
		<welcome-file>default.jsp</welcome-file>
		<welcome-file>default.htm</welcome-file>
	</welcome-file-list>

	<servlet>
		<servlet-name>GuGu</servlet-name>
		<servlet-class>och01.GuGu</servlet-class>
	</servlet>
	<servlet-mapping>
		<servlet-name>GuGu</servlet-name>
		<url-pattern>/GuGu</url-pattern>
	</servlet-mapping>

</web-app>'프로젝트 기반 JAVA 응용 SW개발 : 22.07.19~23.01.20 > Servlet, JSP' 카테고리의 다른 글
| 9/19 css 셀렉터, Ajax (0) | 2022.09.24 |
|---|---|
| 9/8 JSTL을 구성하는 작은 라이브러리들, forEach, forTokens (0) | 2022.09.15 |
| 9/7 EL, jsp.forward, 자바빈 (0) | 2022.09.12 |
| 9/5 <%! %>, application, request, error 처리하는 여러가지 방법, 서블릿 구조 init, doGet, doPost, destroy (0) | 2022.09.12 |
| 9/2 Servlet, web setting의 get과 post, JSP 시작 (0) | 2022.09.12 |


